
How to Maintain and Replace a Brake Master Cylinder
2024-10-14
Maintaining your vehicle’s brake system is crucial for safe driving. Since the brake master cylinder is an essential part of this system, ensuring it stays in top condition should be a priority. In this blog, we’ll go over some maintenance tips and steps for replacing a faulty brake master cylinder.
Routine Maintenance for Brake Master Cylinders
1. Check Brake Fluid Levels Regularly
- Open the reservoir cap and ensure the fluid is between the minimum and maximum marks.
- Use only the type of brake fluid specified by your vehicle manufacturer (DOT 3, DOT 4, or DOT 5).
2. Inspect for Fluid Leaks
- Check around the master cylinder and brake lines for any signs of leakage.
- Leaks can lead to reduced hydraulic pressure and impaired braking.
3. Flush Brake Fluid Periodically
- Over time, brake fluid absorbs moisture, reducing its effectiveness.
- Perform a brake fluid flush every 2-3 years to maintain optimal performance.
4. Test the Brake Pedal Feel
- A soft or spongy brake pedal may indicate an issue with the master cylinder or air in the lines.
When Should You Replace the Brake Master Cylinder?
If you experience the following issues, it might be time to replace the brake master cylinder:
- Brake Fluid Leaks: Persistent fluid leaks around the cylinder indicate seal failure.
- Spongy Brakes: If the pedal feels soft or needs pumping to build pressure.
- Warning Light: A brake warning light can indicate fluid loss, hinting at a possible master cylinder issue.
- Inconsistent Braking: If braking feels uneven or unpredictable.
Tools Required for Replacement
- Brake fluid (manufacturer recommended)
- Wrenches (for removing lines and mounting bolts)
- Bleeder kit (for removing air from the brake lines)
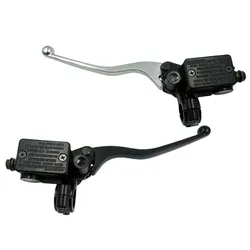
- New brake master cylinder
- Gloves and safety goggles
Steps to Replace a Brake Master Cylinder
1. Prepare the Vehicle
- Park the vehicle on a flat surface and disconnect the battery.
- Use safety gloves and goggles for protection.
2. Drain Brake Fluid
- Use a bleeder kit to remove as much brake fluid as possible to avoid spillage.
3. Remove the Old Master Cylinder
- Disconnect the brake lines from the cylinder using wrenches.
- Unbolt the cylinder from the brake booster and remove it.
4. Install the New Master Cylinder
- Bench bleed the new master cylinder (follow the manufacturer’s instructions).
- Mount the cylinder onto the brake booster and secure it with bolts.
- Reconnect the brake lines and ensure all connections are tight.
5. Refill and Bleed the Brakes
- Refill the brake fluid reservoir.
- Bleed the brakes at each wheel to remove air from the lines.
6. Test the Brakes
- Press the brake pedal multiple times to build pressure and ensure it feels firm.
- Check for any leaks around the master cylinder and brake lines.
Conclusion
Replacing a brake master cylinder can seem daunting, but with the right tools and instructions, it’s a manageable DIY task. However, if you’re not confident in your skills, it's always best to seek help from a professional mechanic. Proper maintenance and timely replacement will keep your brake system in peak condition, ensuring safety for you and your passengers.